Step-by-Step Guide
Each button on the remote can be programmed to operate one product, such as garage door opener, gate operator, or commercial door operator.
WARNING
The remote control must be used ONLY with door openers manufactured after 1993 that utilize photoelectric sensors.
Before we begin
Please check the following list of garage door opener brands:
- Chamberlain
- LiftMaster
- Craftsman
- Raynor
- AccessMaster
- Do-It
- Master Mechanic
- True Value
Is your opener one of the brands listed above?
Please proceed with the following steps for further check.
Unfortunately, our remote isn't compatible with your specific model.
Our remote is likely incompatible. While you may attempt the steps below, success is not guaranteed.
Preparing
- Start with the garage door CLOSED.
- Ensure there is a working light bulb in your garage door opener, as it serves as a programming indicator.
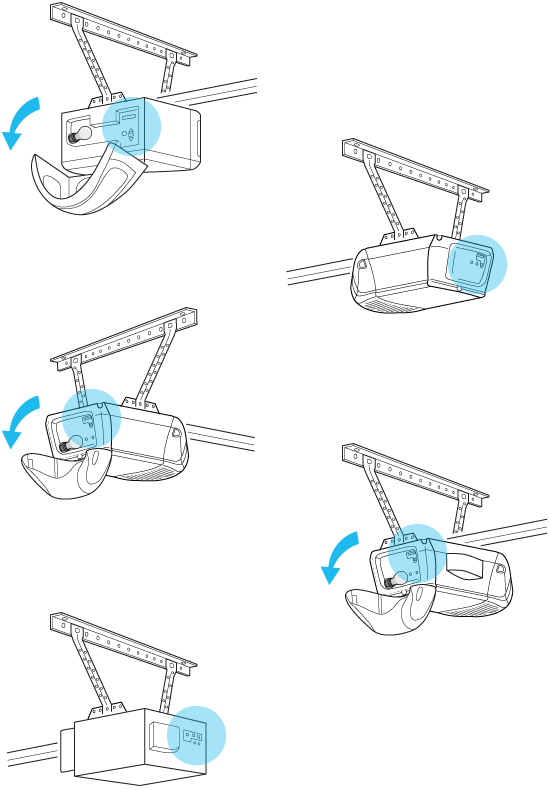
Step 1 - Locate the LEARN button
The LEARN button on your garage door opener is typically located above the antenna wire that hangs from the motor unit.
If you can't see it from the outside of the motor unit, it may be under a light cover or decorative cover. Grab a ladder and pull the cover down or to the side to reveal the dashboard.
SAFETY FIRST
USE A STABLE LADDER.
The LEARN button's color will be either Green, Red/Orange, Purple, or Yellow, as shown in the table below.
Sample Image |
Learn Button Color & Shape | Technology | Year of Manufacture |
|---|---|---|---|
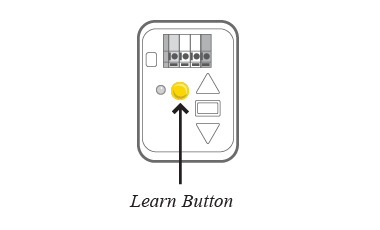 |
Yellow Round |
Security+ 2.0 | 2011+ |
 |
Purple Square |
Security+ 315MHz | 2005-2014 |
 |
Red/Orange Square |
Security+ 390MHz | 1997-2004 |
 |
Green Square |
Billion Code | 1993-1997 |
Is your LEARN button listed in the table above?
Please proceed with the following steps.
Unfortunately, our remote isn't compatible with your specific model.
It likely uses older technology (DIP switches) or a newer standard (Security+ 3.0). You can still try the following steps, though they may not work.
Step 2 - Enter programming mode on the remote
Press and hold the two buttons (see below) at the same time for 3 seconds until the remote's LED lights up solid.
NOTE: If LED doesn't turn solid, retry holding both buttons firmly at the same time.

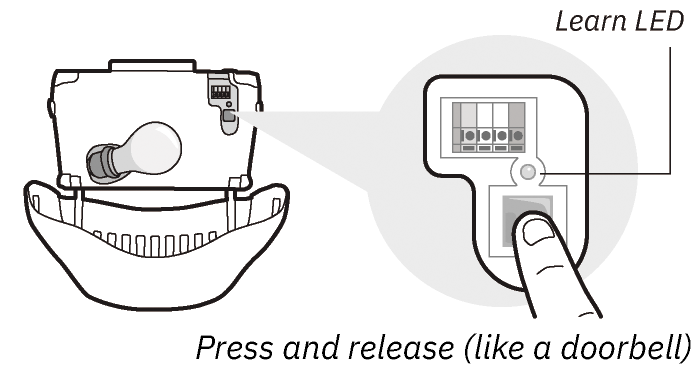
Step 3 - Enter programming mode on the garage door opener
Quickly press and release the LEARN button on your garage door opener.
The Learn LED will turn on for 30 seconds.
DO NOT HOLD THE LEARN BUTTON
Holding the LEARN button for more than 6 seconds will clear all remote controls from the memory on your garage door opener.
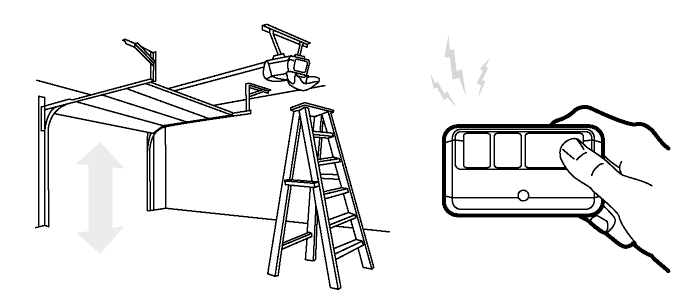
Step 4 - Program remote to garage door opener
You must complete this entire step within 30 seconds of pressing the LEARN button.
- Press and HOLD the remote button you want to use. Do not let go yet. (Note: The remote is now scanning through different codes)
- Keep your eyes fixed on the garage door opener. Wait for ONE of these signals:
- The main light bulb flashes.
- You hear a "click" sound.
- The garage door starts to move.
SEE A SIGNAL?
RELEASE THE BUTTON IMMEDIATELY TO SAVE THE CODE.
CRITICAL: You must release the button within 2 seconds of the signal, or the remote will cycle to the next code and fail. If this happens, restart from Step 2.
NO SIGNAL AFTER 30 SECONDS?
Release the button. Wait 5 seconds and restart from Step 2 to try again.
Step 5 - Test the remote
Test the remote control by pressing the button you just programmed. The garage door should move.
Having problems?
If the garage door opener does not activate:
-
Repeat the programming steps 2-4 carefully.
-
Check the troubleshooting guide on the FAQ page for more help.